The original method of rooting fig cuttings in coco coir is one of the most effective ones I use. In just 3 to 4 weeks most cuttings develop a few roots and can be placed in an individual pot. The problem with this method is the change of rooting medium between the coco coir and the potting medium.
Also, not all cuttings develop at the same time and, closed in the box, the leaves of the more developed one’s can suffer. So, you have to compromise and decide the best time to stop the rooting in the coco coir and change all or some of the cuttings to the potting medium.
Usually, when placed in a pot, most cuttings stop growing for a while. In some less developed ones, the small leaves can whither and the cutting might die when the young roots fail to adapt. The roots are very delicate at this stage and you have to be very careful with the adaptation period.
Too much medium moisture and not enough ambient humidity can cause problems and some young plants can even die. In my search to improve the original rooting method I tried various approaches. Most of these small tweaks implied easing the transition between rooting and potting medium, leading to an improved success rate.
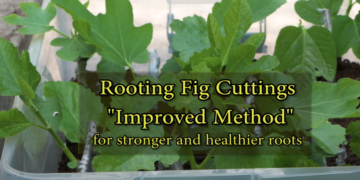
So, here’s my final approach in refining the method, which allows for healthier roots, greater success rates and quicker developing plants. All the cuttings were prepared in the usual way. The top half is wrapped in Parafilm to help avoid dehydration.
The cutting is scrapped near the last nodes, as these injuries promote root growth. A fresh cut is made near the last node. Rooting hormone is applied to the scrapped area and fresh cut. This last step is optional, as it only speeds the development of the new roots.
The uncovered part of the cutting is placed, horizontally or at an angle, in slightly damped coco coir. If you are not familiar with the way I prepare my cuttings be sure to check my other earlier videos on this subject.
In the first 3 to 4 weeks the boxes have the lids mainly closed, although a few periods of aeration are necessary to avoid outbreaks of mold. In the usual method, after 4 or 5 weeks the rooting cuttings are approaching the potting stage.
In this new approach, I simply open the lid definitively and allow the cuttings to develop for a few more weeks, in the coco coir. With this variant you have to maintain the rooting cuttings with an adequate level of moisture.
As the lid is open, at least a daily spray of water might be needed, depending on room temperature and ambient humidity. As leaves grow larger, make sure enough moisture is provided to compensate for leaf evaporation.
After 8 weeks since start, the rooting cuttings are looking good. Around 9 weeks they are almost ready to pot up. After 10 to 11 weeks the small plants are well developed and have an established root system.
These older plants will support much better the transition to a potting medium. Some cuttings are so well developed that they can be potted directly to a bigger pot. The potted plants have shown no period of adaptation, unlike younger cuttings and regain their natural vertical shape in less than a week.
I also tried to maintain the rooting cuttings in the coco coir for longer periods. For this experiment, I used a bigger box and placed the cuttings in a more vertical position. After 4 weeks the lid was removed.
Moisture was applied has needed during the cuttings development. As coco coir is an inert medium, a very small amount of liquid fertilizer was added to the water to provide the necessary nutrients. At 7 weeks most cuttings were developing fine.
At 9 weeks some of the less developed cuttings died, probably due to competition, as too many cuttings were placed in a tight space. After 11 weeks the plants started to slow down their growth. Around 12 to 13 weeks the plants were starting to show signs of stress, so I decided to Pot them up.
In conclusion, keeping the cuttings in the coco coir for a few more weeks improves the success rate. Nevertheless, it seems there are no advantages in keeping the cuttings in the coco coir past the 11 to 12 weeks mark, as this comparison clearly shows.
Thanks for watching If you enjoyed the video and want to help me make more, LIKE, Subscribe, Share and leave a Comment to support the channel. Click the Bell to receive notifications of new videos.
