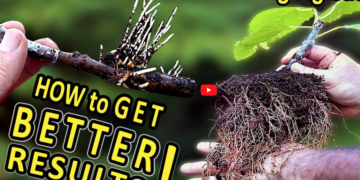
This video covers 4 different rooting systems. Some are minor variations but, as always with these things, if they improve on the original and give the cuttings a better survival rate, they are worthwhile.
All the cuttings were prepared the same way. The top half was covered with parafilm. They were all lightly scrapped, near the bottom, at both sides of the last node. A fresh cut was made, to approach the bottom of the cutting to the last node.
The cut and scrapped area were covered with a thin layer of rooting hormone. In the 4 methods, since enough cuttings of the same variety existed, they were not covered with parafilm, to compare results.
With this method of preparation, most cuttings will start to develop roots near the scrapped area. Nevertheless, developing roots (and later some leaves) is not all, as these will have to stay alive in the following weeks for the cutting to succeed.
For instance, changing the cuttings from medium and environment, after the development of roots, can cause an abrupt decay followed by the death of the cutting, if you don’t take some precautions. So, a few different methods and mediums can be used to try to avoid these issues.
The 4 methods used had a few differences between the main rooting variables One of them was the type of mix or soil available to the cuttings. Light and easy to drain mediums will prevent problems with rotting roots.
So, easy soaking and heavy rooting mediums are best avoided. All the cuttings were in the shade in the first few weeks. Even after the first leaves appeared, the cuttings were only exposed to indirect sunlight for the next several weeks.
All 4 methods were started by early March and temperatures were not controlled. 1 rooting method was done inside and the other three were done outside (where it was colder at night) An attempt was made to maintain adequate moisture in the rooting medium in all the methods.
Plastic wrap, water bottles, or parafilm were used, in 3 methods, to avoid cutting dehydration above the soil level. Not all cuttings were of the same shape, size or variety. Wider cuttings are usually slower and some varieties are more difficult to root.
So, my intention was not to maintain perfect conditions and control all the variables, as in a valid scientific experiment. Just to make a rough comparison of a few different methods by changing a few variables.
Rooting directly in a pot avoids the need to change the cuttings from one rooting medium to another, so the roots are not disturbed. Nevertheless, you can’t see if the cuttings are developing roots.
Also, it’s more difficult to control the level of humidity in a small pot, in the critical stages of rooting. You can easily overwater or underwater unless you use a soil moisture meter to measure the moisture level of the soil.
You can also use the weight method to determine watering needs. The pots will need watering when they start to feel light. The pots were covered with a plastic film cover to help maintain the temperature and avoid excessive moisture from rainwater, as they were placed outside.
A light, the good draining potting mix was used. Irrigation was done by means of a couple of weekly light water sprays. When an unexpected heatwave struck my area, in May, the watering schedule was increased to avoid cutting dehydration.
A few cuttings never developed any leaves. Others did but eventually died out, probably due to a lack of root development. In this method, I used a mix of sand, soil, and potting mix to provide a good, fast-draining rooting medium.
The use of this mix in a larger pot may help to avoid problems of excess humidity and rotting of the cuttings and rots. The cuttings can stay above the lower, wetter area, in case of excessive watering or rain.
The pots were placed outside, around more developed plants and under a tree, to avoid direct sunlight. After 1 month most of the cuttings didn’t have a single root, probably due to the outside lower temperatures.
In some, the scrapped area has even healed and no roots have developed. After 2 more weeks, the first roots started to appear. After 2 months and a half, I made the decision to remove the plastic covers.
The step of removing the cover proved fatal for many of the cuttings as it coincided with a heatwave. More than half the cuttings dry out. Only a few more developed survived while others may yet pull through.
Probably the quick change in air temperature and humidity was too much for most of them and the leaves quickly withered and died. The third method I used is covered in detail in several of my rooting videos and consist of pre-rooting in boxes, using an inert medium.
The cuttings are placed in a plastic box with a lid, full of damp coco coir. The lid is opened from time to time to avoid the development of mold. Even when a fungus develops inside a box, they can be easily removed and they can’t enter inside the cutting which is protected with parafilm.
The adequate moisture level is easy to maintain as the coco coir changes to a lighter color when drying out. As this material has a great potential to absorb water, care must be taken to avoid placing the cuttings in excessive moisture.
The development of roots is also easy to notice in the walls of the box, so it’s easy to know when it’s time to up pot. Usually, after 6 to 8 weeks the cuttings are ready to remove from the box and place in pots.
The pots must have a light mix to ease the transition. Some varieties might take more time to root than others. If a cutting hasn’t developed roots yet, it can be maintained in the coco coir until it does.
The success rate of this method was the highest of the 4 tested. I also have a specific video about rooting directly in the ground using the traditional method. This method has very few needs regarding maintenance after the cuttings are placed in the ground.
A sun cover has to be provided to avoid cutting dehydration. You can use branches, as in the traditional method, or some other type of cover, as I did this time, for convenience. The cuttings have to be watered on a regular schedule, which depends on temperatures and type of soil.
Quick draining soils might need more frequent watering. I installed a perforated tube along with the cuttings and watered 2 times a week for a few minutes, except in rainy weather. With this method, most cuttings seem to do well at first.
Nevertheless, many can dehydrate quickly, especially if they are not protected with parafilm. Another problem is the potting up phase. The roots tend not to react well to the disturbance and to the different moisture levels when in the pots.
So, an adaptation period is, usually, unavoidable. After comparing the 4 methods the pre-rooting in coco coir had the highest percentage of successful cuttings. As these cuttings were rooted indoors they developed roots much faster and now have the greatest development.
The higher variations of temperature and moisture levels of the other 3 methods combined with uncertain weather might explain the poorer results. Rooting directly on the ground seems to be in second place as only a few cuttings dried out.
But the potting up phase has to be completed yet, so it’s not a definitive position. Rooting directly in pots might seem a good idea, as there are no further manipulations and the roots are undisturbed.
Nevertheless, the results of these 2 methods were the lowest in terms of the percentage of successfully rooted cuttings. Thanks for watching Like, Subscribe, Share and Leave a comment, to support the channel Hit the bell to receive notifications of new videos


